Residential Solar Panel Installation Guide 2026: Costs, Timeline, Preparation & Expert Tips
- Roof Condition
- Roof Orientation
- Roof Pitch
- Shading Analysis
- Electricity Usage
- Solar Panels
- Inverter
- Mounting Hardware
- Monitoring System
- Battery Storage (Optional)
- Texas
- Florida
- California
- How long does residential solar installation take?
- How much does residential solar installation cost?
- Should I replace my roof before installing solar?
- Do I need a battery with my solar system?
- Can I install solar panels myself?
Residential Solar Panel Installation Guide: Costs, Timeline, and Preparation
Installing residential solar panels is one of the most effective ways to lower electricity bills, increase home value, and reduce dependence on traditional utility companies. As solar technology continues to improve in 2026, homeowners have access to more efficient panels, smarter energy management systems, and financing options that make switching to solar more affordable than ever.
However, a successful solar installation requires more than simply choosing high-quality panels. Homeowners must evaluate their roof, understand installation costs, secure permits, select a qualified installer, and prepare for every stage of the project.
Whether you're considering solar for the first time or comparing contractor proposals, understanding the complete installation process can help you avoid costly mistakes and maximize your long-term return on investment (ROI).
This comprehensive guide explains everything homeowners need to know about residential solar panel installation in 2026—from planning and budgeting to timelines, inspections, and post-installation maintenance.
Why Install Residential Solar Panels?
Residential solar systems provide financial and environmental benefits that continue for decades.
Key advantages include:
- Lower monthly electricity bills
- Protection against rising utility rates
- Increased property value
- Federal and state incentive eligibility
- Reduced carbon emissions
- Energy independence
- Optional battery backup during power outages
- Long equipment lifespan of 25–30 years
For many homeowners, solar becomes one of the highest-return home improvement investments.
Step 1: Evaluate Your Home Before Installation
Not every home is equally suitable for solar.
Before requesting quotes, evaluate:
Roof Condition
If your roof will need replacement within the next 10 years, replacing it before installing solar is usually more cost-effective.
Roof Orientation
South-facing roofs generally produce the highest annual energy output in the United States.
East- and west-facing roofs can still perform well but may generate slightly less electricity.
Roof Pitch
Most residential systems perform best with roof slopes between 20° and 40°, although installers can optimize mounting angles when necessary.
Shading Analysis
Nearby trees, chimneys, utility poles, or neighboring buildings may reduce production.
Professional installers use specialized software and drone imaging to evaluate shading throughout the year.
Electricity Usage
Review your last 12 months of utility bills to determine:
- Annual electricity consumption
- Seasonal usage patterns
- Peak demand periods
This information helps determine the correct system size.
Step 2: Determine the Right Solar System Size
System size depends on annual energy usage rather than home size alone.
| Annual Electricity Usage | Recommended System Size |
|---|---|
| 6,000 kWh | 4–5 kW |
| 8,000 kWh | 6 kW |
| 10,000 kWh | 7–8 kW |
| 12,000 kWh | 9–10 kW |
| 15,000+ kWh | 11–13 kW |
Homes with electric vehicles or future battery storage may benefit from slightly larger systems.
Step 3: Compare Solar Installation Costs
Average residential installation costs in 2026 vary depending on equipment quality, labor, roof complexity, and location.
| System Size | Average Installed Cost |
|---|---|
| 4 kW | $10,000–$14,000 |
| 6 kW | $15,000–$20,000 |
| 8 kW | $20,000–$27,000 |
| 10 kW | $24,000–$33,000 |
| 12 kW | $29,000–$39,000 |
Federal tax credits and local incentives can significantly reduce the net cost for eligible homeowners.
Step 4: Choose the Right Equipment
A complete residential solar system typically includes:
Solar Panels
Choose high-efficiency monocrystalline panels with long product and performance warranties.
Inverter
Options include:
- String inverter
- Microinverters
- Power optimizers
Microinverters generally provide better performance on partially shaded roofs.
Mounting Hardware
Quality mounting systems protect both your roof and your solar investment for decades.
Monitoring System
Real-time monitoring allows homeowners to track:
- Energy production
- Panel performance
- System health
- Inverter status
Battery Storage (Optional)
Battery systems provide:
- Backup power
- Energy independence
- Time-of-use optimization
- Greater self-consumption
Step 5: Obtain Permits and Utility Approval
Most residential installations require:
- Building permits
- Electrical permits
- Utility interconnection approval
- Final inspections
Experienced installers typically manage this paperwork on behalf of the homeowner.
Permit approval times vary by jurisdiction.
Residential Solar Installation Timeline
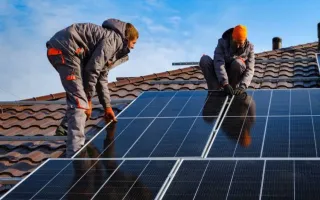
Although roof installation usually takes only one to three days, the overall process is longer.
| Installation Phase | Estimated Time |
|---|---|
| Initial consultation | 1–3 days |
| Site survey | 1 week |
| System design | 1–2 weeks |
| Permits & utility approval | 2–8 weeks |
| Equipment ordering | 1–3 weeks |
| Installation | 1–3 days |
| Final inspection | 1–2 weeks |
| Utility permission to operate (PTO) | 1–4 weeks |
Typical Total Project Timeline: 6–12 weeks
Example Residential Installation Cost
A homeowner installs an 8 kW rooftop solar system.
| Item | Cost |
|---|---|
| Solar panels | $16,800 |
| Microinverters | $2,600 |
| Mounting equipment | $2,100 |
| Electrical components | $1,500 |
| Installation labor | $3,200 |
| Permits & inspections | $1,000 |
Total Installed Cost: $27,200
If the system produces approximately 12,500 kWh per year, the homeowner can substantially reduce annual electricity expenses while increasing long-term property value.
Preparing Your Home Before Installation
Before installation day:
- Remove vehicles from the driveway.
- Clear attic access if needed.
- Trim nearby tree branches.
- Secure pets indoors.
- Inform neighbors about temporary construction activity.
- Verify Wi-Fi coverage near the inverter if monitoring is included.
- Review installation plans with your contractor.
- Confirm warranty documentation.
Good preparation helps installers complete the project efficiently.
What Happens During Installation?
Professional installers generally follow these steps:
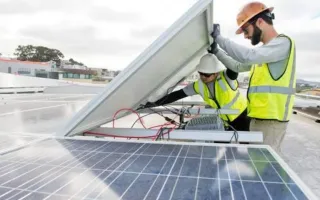
- Install roof mounting hardware.
- Attach solar panel racking.
- Mount solar panels.
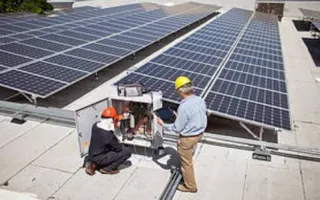
- Install inverter(s).
- Connect electrical wiring.
- Install monitoring equipment.
- Connect to the home's electrical panel.
- Perform safety testing.
- Schedule final inspection.
- Obtain utility approval for operation.
Most residential installations are completed in one to three working days.
Common Installation Mistakes to Avoid
Avoid these costly errors:
- Choosing contractors based only on price.
- Installing solar on an aging roof.
- Ignoring future electricity needs.
- Overlooking battery compatibility.
- Not comparing multiple quotes.
- Failing to review warranty coverage.
- Ignoring local permitting requirements.
- Skipping production monitoring.
A well-designed system should serve your household for decades.
Tips for a Successful Solar Installation
- Request quotes from at least three certified installers.
- Review projected annual energy production carefully.
- Compare warranties for both equipment and workmanship.
- Ask whether monitoring is included.
- Verify installer licensing and insurance.
- Consider future electric vehicle charging needs.
- Install critter guards to prevent wildlife damage.
- Keep copies of permits and inspection reports.
- Schedule annual maintenance inspections.
- Monitor production regularly after installation.
State-Specific Notes
Texas
Texas offers abundant sunshine but also experiences high temperatures and hailstorms. Homeowners should prioritize durable panels with strong hail resistance, low temperature coefficients, and experienced installers familiar with local utility interconnection requirements.
Florida
Florida homeowners should ensure mounting systems meet hurricane wind-load requirements. Corrosion-resistant hardware and regular inspections are recommended, particularly for coastal properties exposed to salt air.
California
California homeowners may benefit from pairing residential solar systems with battery storage due to time-of-use electricity rates and Public Safety Power Shutoff (PSPS) events. Local building codes and utility requirements should also be reviewed before installation.
Frequently Asked Questions
How long does residential solar installation take?
Roof installation generally takes 1–3 days, while the complete project—including design, permits, inspections, and utility approval—typically requires 6–12 weeks.
How much does residential solar installation cost?
Most homeowners spend between $15,000 and $33,000 for a professionally installed residential solar system, depending on system size, equipment quality, and location before available incentives.
Should I replace my roof before installing solar?
If your roof is nearing the end of its lifespan, replacing it before installing solar panels is usually more economical than removing and reinstalling the system later.
Do I need a battery with my solar system?
Not necessarily. Battery storage provides backup power and greater energy independence but increases the overall project cost. It is most valuable in areas with frequent outages or time-of-use electricity pricing.
Can I install solar panels myself?
DIY installation is possible in some jurisdictions, but professional installation is strongly recommended because of electrical safety requirements, permitting, warranty protection, and building code compliance.
Conclusion
Installing a residential solar panel system is a significant investment that can deliver decades of lower electricity costs, increased home value, and greater energy independence. Success begins with careful planning—evaluating your roof, selecting the right equipment, understanding installation costs, and choosing a qualified contractor.
While the overall installation process may take several weeks due to permitting and utility approvals, the actual installation is relatively quick, and the long-term benefits can far outweigh the initial effort.
By comparing multiple installers, selecting high-quality components, and preparing your home properly, you can maximize the performance and financial return of your residential solar system for many years to come.
Ready to make the switch to solar? Gather multiple quotes, review equipment and warranty options carefully, and work with a certified installer to design a system that matches your home's energy needs and long-term goals.